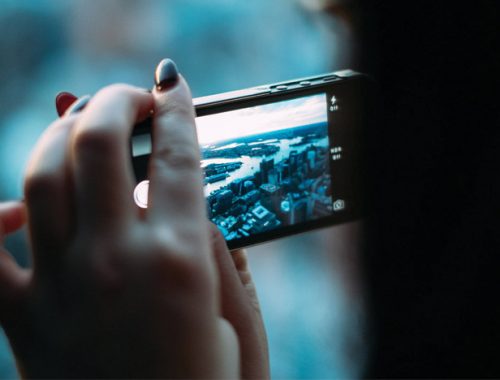
 Your kids are outside playing, and you see the perfect opportunity to snap a picture of your children covered in mud. The image is vivid and colorful with their squinting, freckle-faced smiles. Then they go inside. Mud gets everywhere. The dog is rolling in it; your kids are making a bigger disaster trying to help clean it all up. The moment might be stressful now, but in a few months, you will be laughing over the whole situation. So, you decide to take another picture for memory’s sake. Once everyone and everything is *mostly* clean, you go back to look at the photos you took. You notice the indoor picture’s coloring is different than the outdoor picture. It might even seem dark in comparison even though you can see the image just fine.
Lighting and location are a huge part of photography and can completely change how a photograph is captured. Both Indoor and outdoor shoots give you options for creativity; they just require different techniques to capture the image you want.
Capturing Inside Photos
First things first, make sure you have plenty of light. Artificial light can be difficult to take photographs in if there isn’t enough. Utilize windows, open doors, or bring in additional lighting. Second, find walls or backdrops in more neutral colors and tones. While bright colors are fun, they cast color onto your subject. That could be the effect you are going for, but if it’s not, walls with whiter tones help reflect light making your image brighter. If you can take the picture without the flash do it. If you absolutely need the flash, use an off camera one. Point it at the ceiling or a wall to make the light bounce onto your subject. Avoid aiming the flash directly at your intended target; it flattens the image, creates awkward shadows, and the light from the flash doesn’t reach very far.
Be aware of your camera settings. If your ISO, the camera’s light sensitivity, is too high it can create grainy pictures. Shutter speed generally needs to be lower as well—especially in low light conditions.
Getting Great Outdoor Snapshots

In contrast with taking photos indoors, capturing photos outside has plenty of awesome natural lighting. There are a few tricks for using that bright light to your advantage. To start, use the ‘golden hours’ also known as the first and last hour of daylight to capture photos with the best lighting. Obviously, that isn’t always feasible, and the elements need to be factored into the equation. Avoid direct sunlight as it can make harsh shadows and/or cause a lot of squinting. Shaded areas are ideal. On top of finding the perfect lighting and time of day, the weather can also be a huge factor on shooting outdoors. If it’s cloudy or stormy, light is naturally diffused. This will affect the settings you will need to use on your camera.
Lighting Tricks
For those who have a lot of experience with photography, you probably know, or even have a reflector. Reflectors are great to help direct and soften lighting in your subject area. If you don’t own one, it’s alright. Utilize a plain white sheet as your very own DIY reflector.
To create softer diffused lighting, you can set it up to shadow your subject so there isn’t any harsh lighting directly on them. Due to lighting, you may have trouble with deep shadows under the eyes or chin? Have your subject sit on the sheet. Because it will bounce the light up under their face to soften the shadows. Another trick is if shooting in the shade is lacking the lighting dynamic you want, place the sheet on ground in the sun on the edge of the shadow. Move your subject to the edge of the shadow close to the sheet. As a result, the light will bounce off the sheet creating more dynamic lighting.
The great thing about photography is everything you learn is a great foundation for you to get comfortable with your camera. Be creative and don’t be afraid to experiment. Sometimes “breaking the rules” can create beautiful photos. Most importantly have fun capturing the moment.